DIY – Photo Backdrop

Over the passed few months i have been looking at all the options for photography Portrait backdrops. Like most things there are lots of options and range in price.

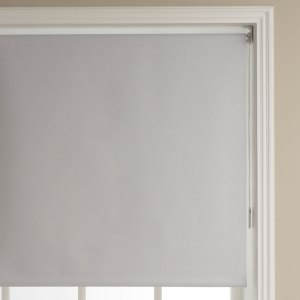
As i like to try things out before spending an arm and a leg on kit, i searched for tips and ideas of DIY backdrops. i found a brief note on a forum about using a roller blind as a backdrop, this was a good idea as you can pick up a wide roller blind for about £20. Also most are wipe clean and the blackout type are thick and provide a good base and all can be wall mounted if required.

0327098_l


The disadvantage of a  standard shop roller blind is the length is only around 160cm, this is fine for Baby,Toddler and small child as you can have them sitting up standing up.


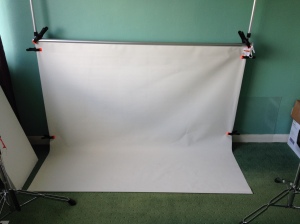
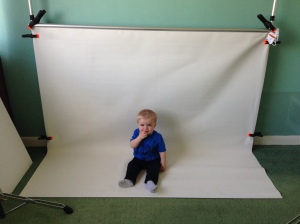
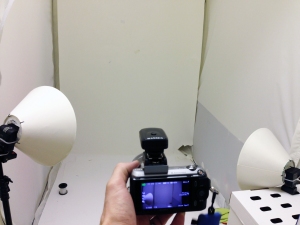
Here are some very quick image i took while setting up, (i did not have my camera to hand so used a Iphone). as you can see you will need to find the correct height and position where you do not get the blind starting to fold.

IMG_3021 IMG_3019 IMG_3010

This is a good and cheap thing to try out if you are starting out in Portrait Photography.

retro-camera-uk-header-01.jpg

DIY Softbox – Lamp Shades

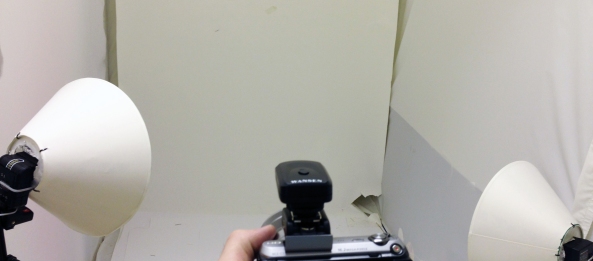
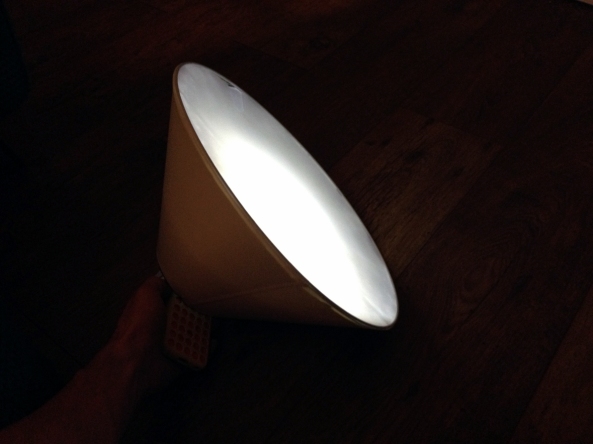
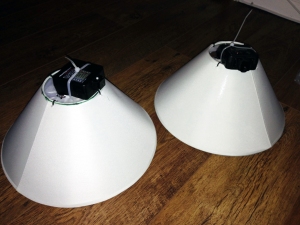
Here is how i made my Lamp Shade Softboxes,

IMG_2856


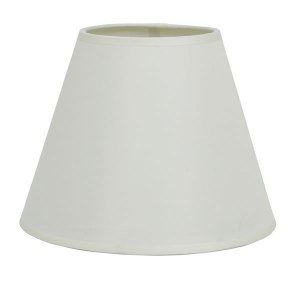
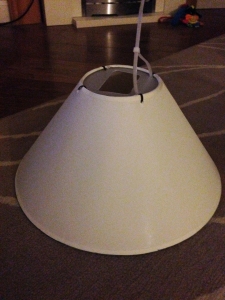
I started off with 2 cheap lamp shades which i got from Wilkinsons (house and Diy Store). these cost £4 each and where the biggest size and cheapest ones. These are a nice size with the large part measuring at 360mm.

0119704_l

The items i used where:

Lampshades x2

double sided tape

kitchen Foil

Frosted Plastic Sheet (thin white card would work also)

Cable Ties


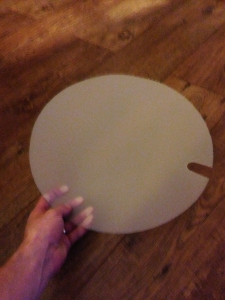
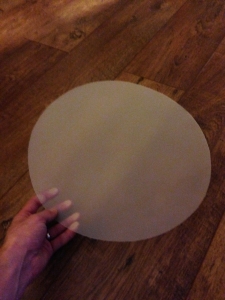
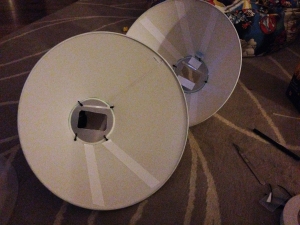
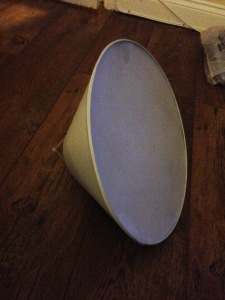
I started by drawing the circle ends, for the large end i have done 2 for each shade, one having a cut out so i can take it in and out and add paper between to soften the  light more if needed.

IMG_2853 IMG_2852

Attach the small circles to the small end with Cable ties by making small holes in the plastic and the shade.

Draw round the flash head and cut out hole with a sharp knife.

IMG_2849


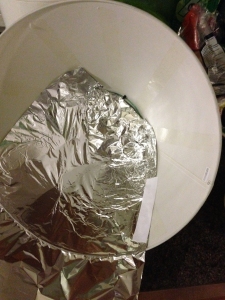
next stick double sided tape in the inside of the shade, making sure that the tape goes close to the end to hold the foil in place.

IMG_2848

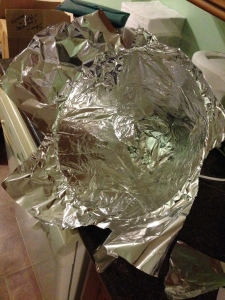
Use the kitchen foil to line the inside of the shade. This makes the light bounce off all angles and gives a wider lighting area.

IMG_2851


trim the extra foil with a knife, leave the metal rim free of foil as your plastic with clip in to this ring which will keep it in place.

IMG_2850


i have used cable ties to keep the flash guns in place but something you can undo would work better allowing you to take the flash gun in and out of the softbox.

IMG_2858 IMG_2854

Add a wireless trigger system (these can be got for £10-£15 off Ebay or Amazon) and these work well, so if you want to have a go at studio photography put don’t want to spend lots at the start. Try this simple idea with some cheap SLR Flash Guns. You can then get a feel and also work out how best to use them.

IMG_2863


retro-camera-uk-header-01.jpg


35mm Images

Developing your own Images.

After a looking for ways to scan negative film and trying the different types. Uses a Scanner with a Negative slot/back lite panel is the best. it may not be the cheapest but it does give you the best results by far.

Im still looking for a cheap one to come available (i may have to visit a few car boots), but managed to borrow one to scan in my few films which have been sat awaiting to be used.

below is some of the first photos i have taken using 35mm for the first time in a while.

Box Brownie Images – using 35mm Film

SLR Images – Using 35mm Film

I Hope you all have a merry Christmas and a Happy New Year and will be back in the new year with lots more photos and tips!

Image

Photax III 1947

photax-iii_01

The MIOM Photax III is a simple viewfinder camera made of bakelite–an early plastic–produced by Manufacture d’Isolants et d’Objets Moulés, a now defunct French company that specialized in electrical insulators and plastic molding. MIOM made several different cameras before and after World War II including eight variatons of their flagship Photax model between 1937 and 1960.

The most unusual and distinctive feature on this relatively rare camera is its telescoping lens barrel which must be extended by “unscrewing” it from the body in order for the lens to focus properly. Many rival camera manufacturers imitated this basic design including Eastman Kodak with its Duex model.

Types of Camera Film

135 (35mm) Film

The term 135 (ISO 1007) was introduced by Kodak in 1934[1] as a designation for the cassette for 35 mm film, specifically for still photography. It quickly grew in popularity, surpassing 120 film by the late 1960s to become the most popular photographic film size. Despite competition from formats such as 828, 126, 110, and APS, it remains so today.

135 (35mm) Film for sale – Local Photo Shop, Discount Store (£1 Shops), Supermarkets & eBay sites (good for out of date film which can give cool effects)

135 (35mm) Processing – Local Photo Shop, Photo Websites & Supermarkets (this can be the cheapest processing)


APS Film

Advanced Photo System (APS) is a now discontinued film format for still photography first produced in 1996. It was marketed by Eastman Kodak under the brand name Advantix, by FujiFilm under the name Nexia, by AgfaPhoto under the name Futura and by Konica as Centuria.

APS Film for sale –  eBay sites (good for out of date film which can give cool effects)

APS Film Processing – Local Photo Shop, Photo Websites & Supermarkets (this can be the cheapest processing) or Revive Studios


110 Film

110 is a cartridge-based film format used in still photography. It was introduced by Kodak in 1972. 110 is essentially a miniaturised version of Kodak’s earlier 126 film format. Each frame is 13 mm × 17 mm (0.51 in × 0.67 in), with one registration hole.

The film is fully housed in a plastic cartridge, which also registers the image when the film is advanced. There is a continuous backing paper, and the frame number and film type are visible through a window at the rear of the cartridge. The film does not need to be rewound and is very simple to load and unload. It is pre-exposed with frame lines and numbers, a feature intended to make it easier and more efficient for photofinishers to print.

Unlike later competing formats, such as disc and APS film, processed 110 negatives were returned in strips, without the original cartridge.

110 Film for sale – Fuji Digital Imaging Service Or eBay sites (good for out of date film which can give cool effects)

110 Film Processing – Fuji Digital Imaging Service


126 Film

126 is the number given to a cartridge-based film format used in still photography. It was introduced by Kodak in 1963, and is associated mainly with low-end point-and-shoot cameras, particularly Kodak’s own Instamatic series of cameras.

Although 126 was once very popular, as of 2008 it is no longer manufactured, and few photofinishers will process it.

126 Film for sale – Fuji Digital Imaging Service or eBay sites (good for out of date film which can give cool effects)

126 Film Processing – Fuji Digital Imaging Service


127 Film

127 is a roll film format for still photography introduced by Kodak in 1912.

The film itself is 46mm wide, placing it between 35mm and 120 “medium format” films in terms of size.[1] The image format normally used is a square 4×4 cm. However, rectangular 4×3 cm and 4×6 cm are also standard.

127 enjoyed mainstream popularity until its usage began to decline from the 1960s onwards in the face of newer, cartridge-based films.[2] However, as of 2013 it survives as a niche format.

127 Film for sale – Photo Supplies UK , Fuji Digital Imaging Service or eBay sites (good for out of date film which can give cool effects)

127 Film Processing – Photo Supplies UK or Fuji Digital Imaging Service


120 Film

120 is a popular film format for still photography introduced by Kodak for their Brownie No. 2 in 1901. It was originally intended for amateur photography but was later superseded in this role by 135 film. 120 film and its close relative, 220 film, survive to this day as the only medium format films that are readily available to both professionals and amateur enthusiasts.

120 Film for sale – Photo Supplies UK or eBay sites (good for out of date film which can give cool effects)

120 Film Processing – Photo Supplies UK

How to Solve Common Exposure Problems

In film photography, there may be nothing more disappointing than shooting an entire roll of film, spending the time to develop it, and then realizing that the images didn’t turn out as expected. Here are a few common exposure problems and some tips to resolve them for the next shoot.

Negative is too light overall, resulting in a print too dark

When film negatives are too light, it likely means it was underexposed. The film speed may have been set too high, shutter speed was too fast, the aperture was too small, or possibly all of the above. It is also possible that the film received less development than necessary in the darkroom. The best way to avoid this problem in the future is to carefully review your film speed and ensure all camera controls are properly set. If rolls of film are frequently underexposed your light meter may also be inaccurate.

Negative is too dark overall, resulting in a print too light

When film negatives are too dark, it likely means it was overexposed. Film speed may have been set too low, shutter speed too slow, or the aperture too wide, or maybe all of the above. It is also possible that the film received too much development time. Again, the best way to avoid this problem is to carefully review all camera settings, including film speed, shutter speed, and aperture. If entire rolls of film are commonly overexposed your light meter may also be inaccurate.

Bright scene is too dark

Common with winter photography or when a scene is too bright overall, the light meter will average all tones for an average mid-gray tone. The problem is that this will turn any bright scene darker. To compensate for this, open the aperture one or two f-stops to overexpose the scene. Learn more about exposing in snow and bright scenes in winter photography tips and techniques.

Subject is too dark against a lighter background

If the subject is backlit by a light source, your light meter may be overly influenced by the background and underexpose the subject. To correct this, move the light meter closure to the subject, measure, set your shutter speed and aperture, then step back into position to take the photograph. Learn more about photographing backlit subjects in exposing for backlighting.

No picture is present but film frame numbers appear

If the entire roll is blank but the film frame numbers are visible then it likely did not catch on the film advance reel. If just a few frames are blank then the lens cap may have been on or the shutter may have failed to open. To ensure that the film is advancing, check that the rewind lever rotates when you advance the film or the frame counter advances. You can also check shutter functionality by opening the back of the camera and pressing the shutter release

No picture is present and no film frame numbers appear

If no frame numbers appear, there was a problem during the film development or it was not developed at all. It is also possible that the film was exposed to light prior to being developed. Review film processing to make sure the necessary steps were completed.

Double or multiple exposures

If images on the negative overlap over the entire roll, you may have accidentally put the same roll of film through the camera. To avoid this, simply be sure to mark film that has been exposed. If images overlap on just one or a few frames, the film did not advance properly. There is a slight possibility that this results from the photographer failing to advance the film a full frame between exposures. But if it commonly happens have the film advance mechanisms checked.

I hope this will help you understand and to get the best out of your Retro Camera

retro-camera-uk-header-01.jpg

How Film Works

Here is a very very basic rundown of what film is, in general, for those of you who are curious or interested in understanding more about chemical composition in photography. I will say that once you have a solid grasp of how paper and film are made and the chemicals used to develop them, it’s easy to venture off into the world of alternative processing… which is super fun. I’ll go more in depth later about alternative processing (personally I have always wanted to do albumen prints but have never had a darkroom to myself where I could) but for now let’s start with the 101 of how film works:Film is composed of layers. Many layers. These are different for color, slide, black and white, and instant film but all contain millions of light-sensitive silver halide crystals (what we call grain) that you expose when you pop the shutter. While the other layers are crucial, for our purposes we will be looking at the light sensitive layers. Color film has three layers of silver halide: red, blue, and green.

Slide film has a few more layers than C-41:

Black and white paper is what we call “orthochromatic” which is basically a fancy word for “red blind.” This is why you can print black and white in a darkroom with the redlight on, allowing for minimal vision, whereas when printing color you must remain in total darkness. Very weird, and kind of fun. Technically you can still buy orthochromatic black and white film, but it’s not very common. Most black and white film today is panchromatic, which means it is sensitive to all colors of the visible light spectrum. The layer composition of black and white film is simpler:

You’ll notice they all have what we call an “antihalation” coating or layer, which is basically applied to the back layer to absorb stray reflecting light from the film emulsion.

So basically, that sums up how film absorbs light… um, for beginners.

Article Sourced from “i still shoot film”

retro-camera-uk-header-01.jpg